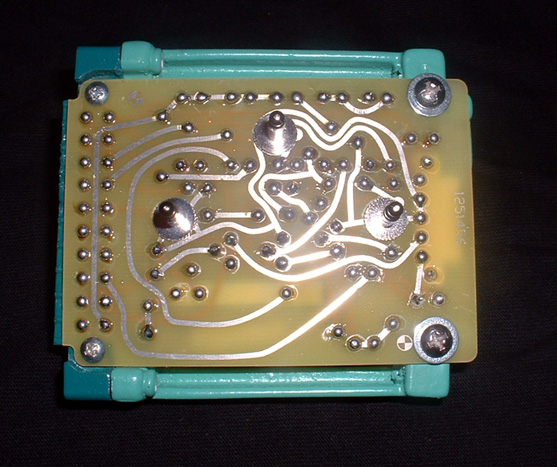
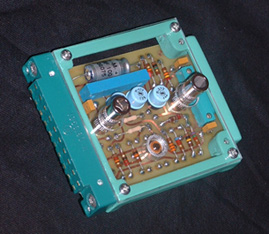
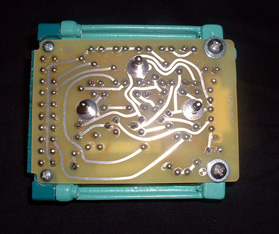
THE Power Pack
The finishing touch to my B9 robot. To give a brief history, the power pack is actually a component of a piece of military equipment that was used in the 60's. At the time, the prop builders salvaged it from the equipment, modified it by adding 3 phono jacks, replaced some screws and covered the electronics with clear plastic. I was able to secure another original component identical to the one used on the show and cast resin copies of the frame components. The circuitry was then created using art work of the original. The printed circuit board was professionally etched, tin plated, drilled and routed to the specs of the original. Since the original power pack was part of military equipment all the electronic components are, of course, military grade. So, to be totally authentic I used actual military grade electronics from that time period in the power pack. The 2 different greenish colors that are on the various frame components were computer color matched from the originals. The paint used is a custom industrial mix. The finished piece is not only the most accurate replica of the original power pack, but a work of art in itself. You can click on the pics below to zoom in on the details! Much thanks to Mike Davis for his help in creating the power pack.
A Crown Fit For A King!
I've gone over the top here to make the ultimate B9 crown for my robot! Meticulously researched to duplicate the look of the original, even detailing the riveted fins. This crown is made entirely out of Stainless Steel - 38 parts in all. 12 Laser cut and hydraulic press bent Stainless fins, a laser cut Stainless mounting disc, a machined Stainless shaft collar, and even Stainless rivets with Stainless mandrels! Carefully hand assembled, resulting in an 8 ounce piece of Stainless Steel art. No polishing was necessary! When the pyramids have turned to dust, this crown will be still be around, sparkling in the sunlight.
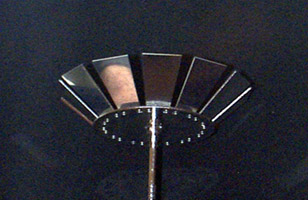
The weird flesh colored fin is the reflection of my arm while holding the crown for the pictures!
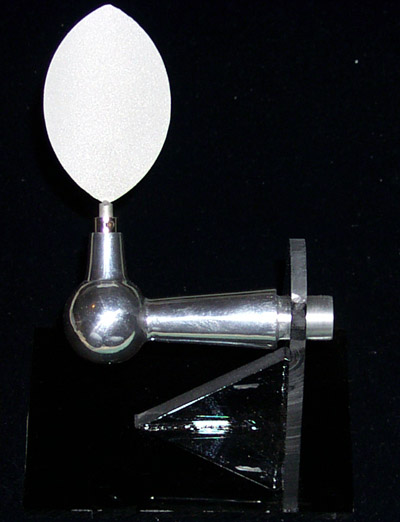
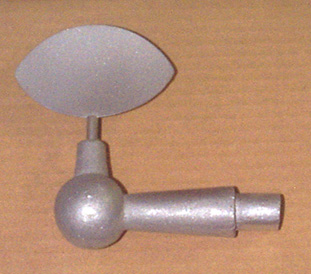
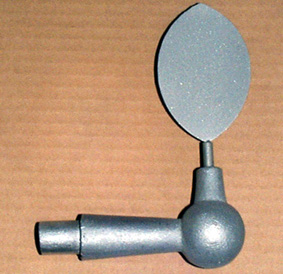
Awesome Aluminum Ear Posts
I had these custom cast in aluminum,
then heat treated for durability and machinability. Since they are solid
aluminum, they won't chip, crack, shatter, or warp. Due to the casting process, they have a textured finish very similar to those on the original robot costume. I wasn't sure if I liked the "textured look", so I cleaned them up with emory paper to make them perfectly smooth. They could also be buffed to a mirrored finish! I made a few pairs and tried all of the above to get the finish I was happy with - check out the pics!
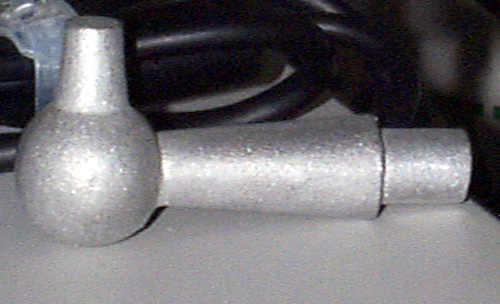
Here's a pic of the ear post that was sanded smooth with emory paper, then buffed to a mirror like shine.
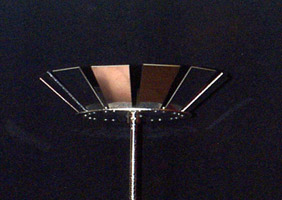
Stainless Steel Spinners
Custom crafted from stainless steel, these pieces have been laser cut, then precisely bent on a hydraulic press to get the proper curvature. After that, they were TIG fuse-welded to a stainless steel rod for easy mounting. This final assembly was then glass beaded to give a nice uniform matte finish, just like spinners on the show.
To make them look like the 2nd/3rd season spinners, I could easily paint them with the appropriate red and yellow colors.
Below are some pictures of my spinners mounted on my aluminum ear posts.
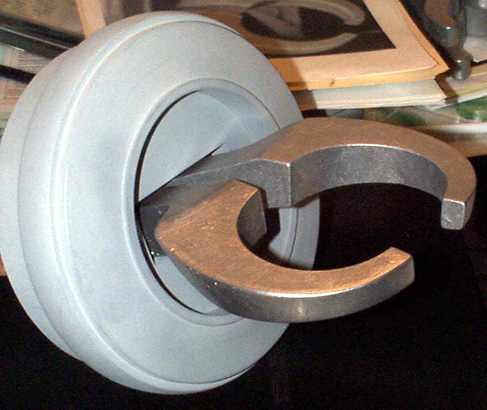
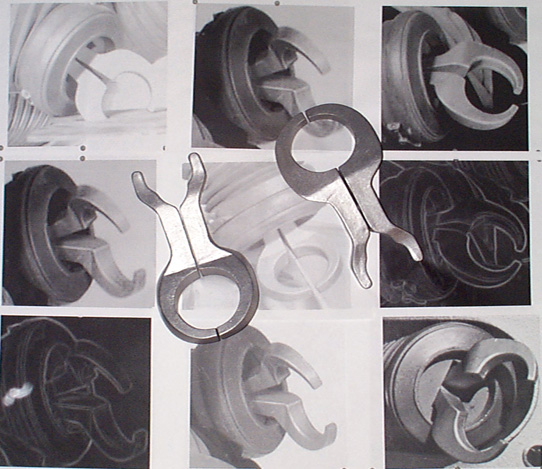
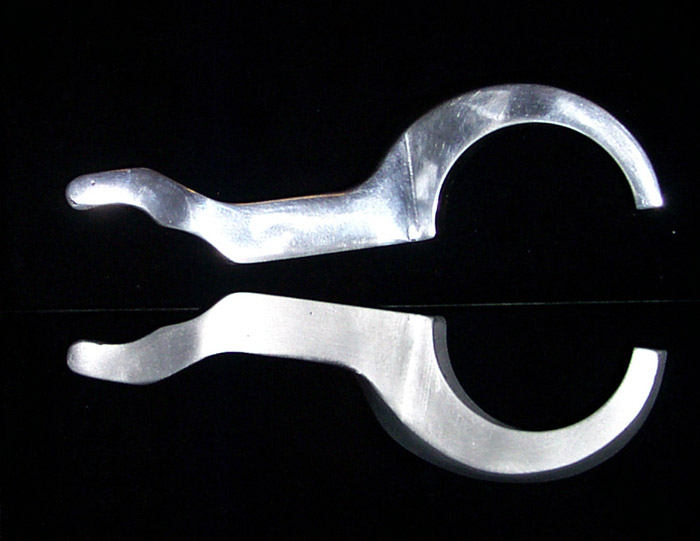
Accurate Claws in Aluminum and Resin
Painstakingly researched, these are the only claws other than the originals that have the critical bend in the proper place! This gives my replica B9 the look that even Icons couldn't achieve! A true mix of engineering and artwork. I made them as unfinished aluminum castings (the original claws on the B9 are reported to have been aluminum), and also cast from resin. The aluminum version required sanding with emery paper before painting. The resin claws were easier to work with and required less prep work before painting.
Here are some pics of the unfinished aluminum claw castings in Scott Sanderson's wrists. So close to the originial it's scary!
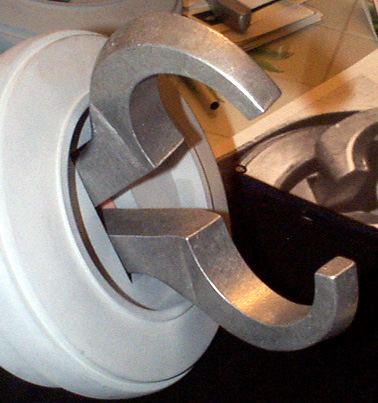
Here are some pics of my claws after they have been smoothed with emery paper by hand. The bottom half was simply sanded, while the top half was buffed to a mirror finish.
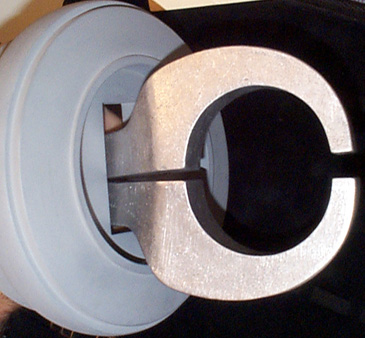
Here are some pics of resin claws I made for my friends. The 4 rectangular blue-green blocks on the right are the molds used for resin casting. The resin pieces shown are fresh from the molds, and have yet to have the sprues removed.

Check out some cool info about the B9!
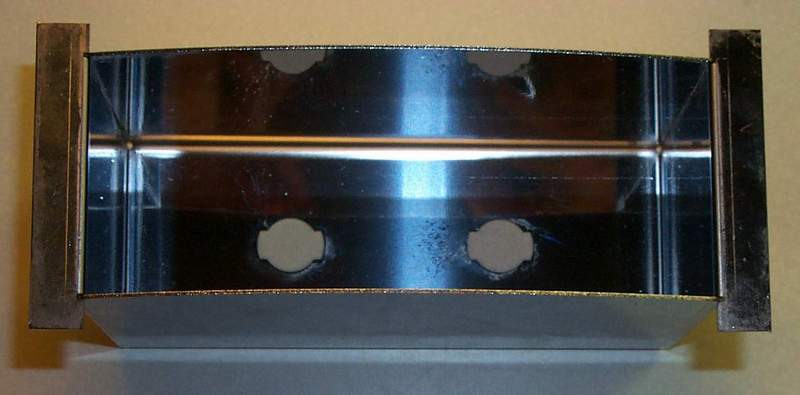
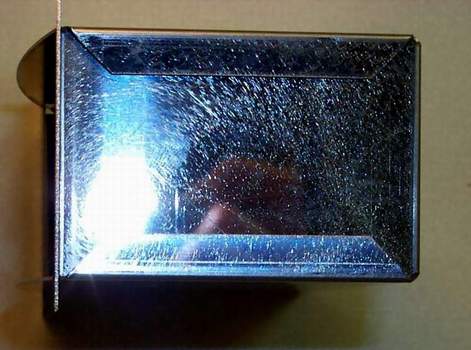
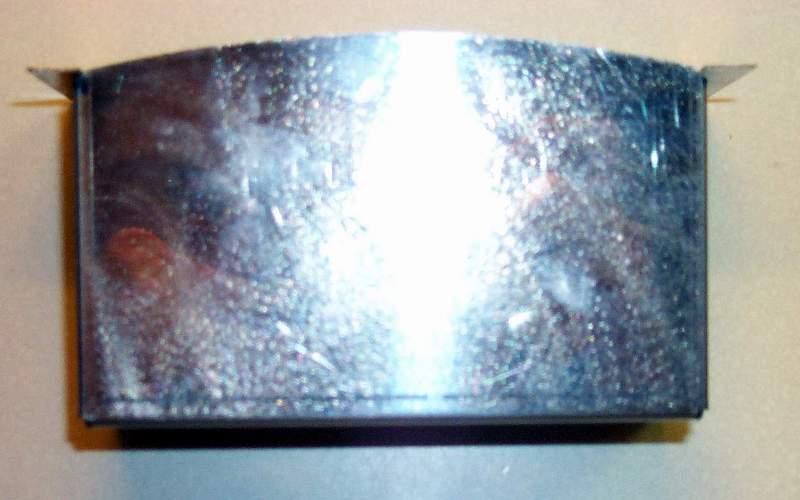
The Ultimate Lightbox!
My lightbox was designed to mount on the inside of the torso, behind the
front teeth lights. It is made of laser cut stainless steel, slightly
over 1/32" thick. The laser cut stainless steel was precision press
bent to make the final box. I designed the box to work with Norm's chest
buttons and Scott's bezel.
The front of the box is curved to precisely match the curve of the inside
of the torso. The inside of the box is a mirror finish, just like the
finish on my stainless steel crown. There are two pre-wired "twist lock"
style lamp bases in the back of the box to hold the light bulbs in place.
Since they are twist lock style, I never have to remove the light box
assembly to change a bulb! The mirror finish combined with the two
lights gives a nice even illumination to all 10 chest buttons.
I'll have some photos of my finished lightbox up shortly.
If you have any questions or comments, please contact Bill
Kendzierski (JMKWWK@aol.com)
PS, I only check my email a few times a week. I will respond to your email when I read it.